Homemade Food Coloring and Natural Food Dyes
If you like to make your own baby food, then cooking with natural ingredients is clearly important to you. That means you’ll probably want to give artificial food coloring a very wide berth!
There are – as yet – no studies that categorically prove artificial food colors and dyes are harmful. But there ARE studies that give cause for concern, suggesting that synthetic food dyes may contribute to conditions like ADHD and even cancer.
Sources:
Food Dye and ADHD – from WebMD
The Hidden Health Risks of Food Dyes – from Eating Well
And whilst the governments of some countries will insist that certain food colorings are not harmful to health, those same food colorings have been banned in other countries – a fairly strong indication that their true safety is a contentious issue!
This page is not designed to comment or partake in the controversy surrounding artificial food dyes. However, we as a family have certainly read enough to feel it’s in the best interests of our children to avoid them!
After all – our little ones have been brought up on homemade baby food, chiefly to AVOID unwholesome and artificial additives, so we certainly don’t want to introduce them for purely cosmetic reasons… and particularly when there are natural, healthier alternatives available!
This page, then, is designed to help you transform the color of your baby’s food in safe and natural ways, possibly even increasing its nutritional value too!
Whether you’re looking for a natural food coloring for the frosting on baby’s first birthday cake, for dyeing Easter Eggs, or you simply want to create some pink quinoa to tempt a picky eater, read on to discover some ways to produce a rainbow of colors WITHOUT introducing unhealthy – and unnecessary – additives!
Important note: If any of the ingredients mentioned on this page are new to your baby, please observe the four day rule to enable you to identify the cause of any digestive problem or reaction. And remember – you should always discuss the introduction of new foods with your child’s doctor.
Tips for Preparing Homemade Food Coloring
Many of the suggestions below are marked ‘boiled’ or ‘juiced’.
To boil: Simply cover the food with water, bring to the boil, then simmer for around one hour, until the water has become infused with the color. DON’T EAT THE FOOD OR USE IT IN YOUR BABY FOOD RECIPES – it will be nutritionally worthless, as all the nutrients will be in the water!
You can then use the colored water to cook (and thereby color) another food. For example, you could use the water from boiling red cabbage to then cook a batch of brown rice. Hey presto – pinky-purple rice!
Alternatively, you can add the colored water directly to foods like frosting, but it’s important to remember that the water produced by boiling fruits and veggies does NOT produce a deep color in the foods it’s added to.
Instead, it provides more of a ‘hue’ or ‘tint’ – still attractive, but not particularly vibrant (so don’t expect to produce a bright red dye for Elmo using this method!).
To juice: Either use your juicer or cook (if necessary) and puree the foods, either with a blender or by pushing through a sieve. This will produce a more vibrant color than using the boiling method (above) as the pigment is not diluted by water.
Your homemade natural food dyes may change the texture/consistency of whatever you’re adding them to…
…So bear that in mind, particularly if you’re coloring frosting (icing). If you’re using a dye produced by the ‘boiling’ method, you might need quite a lot… and this could make your frosting runny. If your frosting recipe calls for the addition of any liquid (for example, a confectioner’s sugar/water icing), reduce the amount you use to compensate for the dye.
Where too much liquid is an issue, you’d probably be better off using the ‘juicing’ method, where the color is more pronounced and less is needed.
Will my homemade food dyes affect the taste of the food?
This really depends on which method you used to make the coloring.
Dyes made with the ‘boiling’ method are very dilute and their flavour is barely noticeable – you could even get away with using red cabbage water as a frosting dye, for example. If you feel you CAN taste your dye, you can easily mask it – in a frosting, a drop or two of vanilla should do the trick!
Natural food coloring made from juicing fruits and vegetables will have a stronger flavour – on the other hand, less will be needed as the color is stronger too.
Although it’s a good idea to try to pair sweet dyes with sweet foods (don’t forget that foods like beets and carrots are sweet!), it’s worth experimenting a little. You may find that you can blend a ‘savory’ dye with a sweet food and still produce a yummy result!
Achieving a smoother color
It’s possible to blend fruit/veggies directly with the food you’re trying to dye (blueberries with frosting, for example, to get a purple-pink frosting).
However, this may give you a ‘flecked’ look and little bits of skin may be visible. Straining the cooked fruit/veg then using the juice itself with give a smoother result and more even color.
Foods that stain fingers will stain other foods!
So sometimes you can avoid boiling/juicing and straining altogether, and simply stir chunks of food that stain (like beets/beetroot) into the food you want to dye.
For example, you can turn mashed potato pink by stirring pieces of cooked beets around in it, then removing them before serving. This avoids making the mashed potato too thin by adding liquid to it.
If you really want a natural food dye but don’t have time to make your own…
Check out these natural food colorings by Watkins. They’re made from pure vegetable juices and spices, with no synthetic ingredients.

Watkins Food Coloring - from Amazon
Homemade Food Coloring Ideas
Different quantities of the following foods will produce will produce different depths of color. When selecting fruits or veggies to make your dyes, look for the most deeply pigmented one available.
Red/pink
- Red cabbage, boiled or juiced
- Strawberries
- Cherries
- Raspberries
- Beets/beetroot (boiled or juiced)
- Red bell pepper (roasted and pureed)
- Paprika (add powder directly, or dissolve in water)
- Red Beet Powder or Tomato Powder (from Amazon). These are both fantastic food colorings with lots of other culinary uses too!
Purple/blue
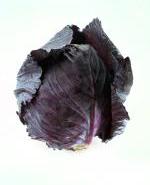
- Red cabbage, boiled or juiced
- Eggplant/aubergine skin, boiled or juiced
- Blueberries
- Blackberries
- Beets/beetroot (boiled or juiced)
GREEN
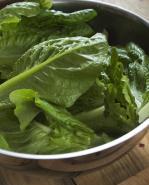
- Kale, boiled or juiced
- Spinach, boiled or juiced
- Water cress, boiled or juiced
- Spinach Powder (dark green) or Asparagus Powder (light green) from Amazon… excellent food colorings and also suitable for soups, stocks and more!
YELLOW/ORANGE
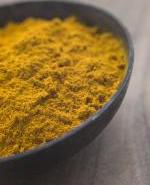
- Carrots, boiled or juiced
- Saffron (not our favourite choice as it tends to be expensive and imparts a fairly strong flavour)
- Turmeric (either dissolve in water or add powder directly – it has a fairly mellow flavour that is easily masked)
- Golden beets (they impart a very dark yellow color – almost brown!)
- Carrot Powder from Amazon… another effective food coloring and a great addition to stews and casseroles.
We hope you have been inspired by our list of homemade food coloring ideas.
